Ophelia

Ophelia sculpture

Ophelia sculpture

Ornate mirror, latex, plaster

This was the outcome of a course that I’ve just completed in ‘Casting for Sculpture’.  The hands are my own hands, with molds created from plaster and modroc, and then cast in latex.  The head was created by latexing a doll’s head several times to create a mold similar to those used in garden gnome kits (remember those?) and then cast in plaster.  The mirror came from a charity shop.  Ophelia refers to the character in Shakespeare’s Hamlet, who fell in love with a Prince and then went mad when he rejected her, ultimately drowning herself.

Playing with masks

id with mask

id with mask

After the Hebden Bridge Parade, I’ve had the idea of making more masks.  I’ve been further inspired to do this by watching the progress of Thingumajig Theatre on their blog.  So here I’ve finally pulled out my sculpting materials and had a go at a doll-like mask.  I was working with modelling clay (like plastacine) rather than traditional clay, and it is rather horrible to use.  For my next ones, I’ll get hold of some proper ‘muddy’ clay which I much prefer working with.  This is papier  mache using brown paper (recycled packaging).  I’ve left it unpainted for now, as I quite like the colour and surface as it is.  Who knows quite where I’m going with this, but I’d like to keep playing.   Masks are quite interesting to me as a symbol of the way that people can wear different ‘masks’ or identities in the different areas of their life.

Soft sculpture and drawing practice

Remember ‘id’?  Well, I made another one.

‘id’ II

But what do you do with them?  I decided to use them for drawing practice.  Because I do a lot of my work from photographs, I need more experience drawing from life.  I did the following small sketches (about A5 size) using the dolls as still life models.  I used dip pen and indian ink, which forces me to focus on making an image using lines only, therefore thinking how to use a range of marks to suggest areas of tone.  I also drew them fairly quickly, and directly with the pen.

soft doll in ink 1soft doll in ink 2soft doll in ink 3soft doll in ink 4

Hebden Bridge Handmade Parade Update

Hebden Bridge Handmade Parade 08

Photo: from the Hebweb.  See more photos.

Well, this is why I’ve been quiet around here.  The last two weeks have been completely taken up with helping to make this fantastic parade happen.  I’ve been helping the parade artists to run public workshops where people have been making their own costumes for the parade.   This involved, amongst other things, finishing off, bagging up, and name-labelling over a hundred individual costumes. 

The parade itself was just enormous fun.  There were three bands, stilt performers and enormous puppets made by the artists to accompany the parade.  The weather teased us with a few showers, but actually managed sunshine for a good part of the morning.  Everyone seemed to have a lot of fun, and it is probably one of the most amazing experiences I have ever had.  My own role was to keep a bunch of frogs dancing, swimming, hopping, clapping and generally enjoying the parade.   Today my calf muscles are complaining bitterly, but I’d do it all again tomorrow if I could.  Roll on next year!
parade frogs

Making a Spider – step by step

prosoma

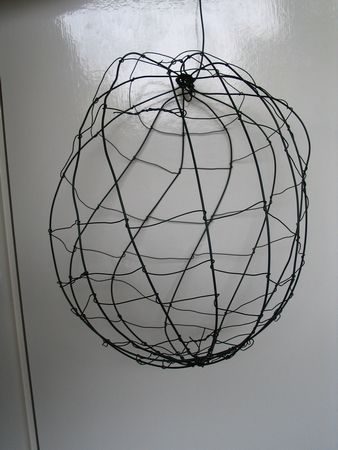
Step one: I made the two body sections using two thicknesses of garden wire.  The thicker wire forms the main structure of an oval-shape.  The thinner wire weaves around this to strengthen the structure. 

structure of legs and body

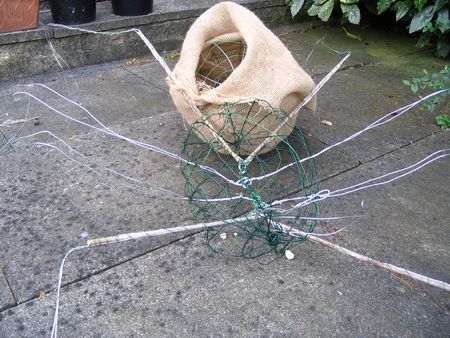
Step two: I made the legs out of double-thickness strong garden wire, and attached them to a wire running down the centre of the top body section (‘prosoma’).  They flopped about a bit, so I tied them down with lots of the thinner wire, and reinforced them in places with lengths of old garden cane.  I started to cover the back section with hessian, but it looked like a body in a sack, so I decided to use cut strips of hessian instead.

detail of string and hessian wrapping

 Step 3: I covered the spider with strips of cut hessian (rough sacking material), binding and stitching it with rough garden twine. 

detail of leg wrapped in hessian

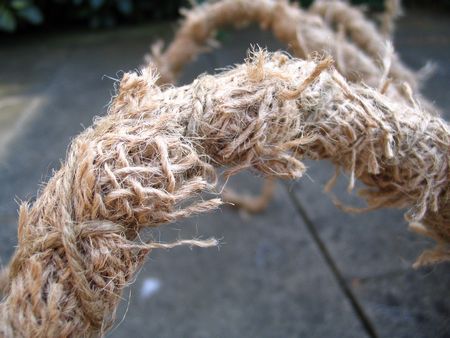
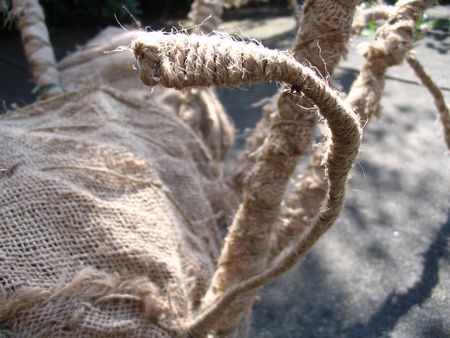
 Detail of wrapped leg.

detail showing how painted

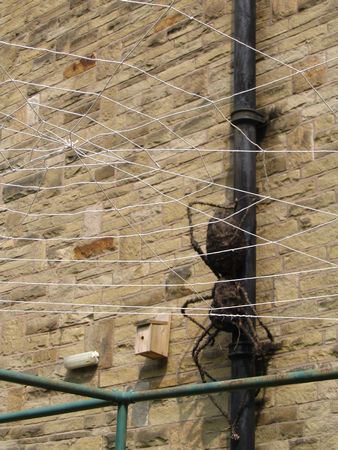
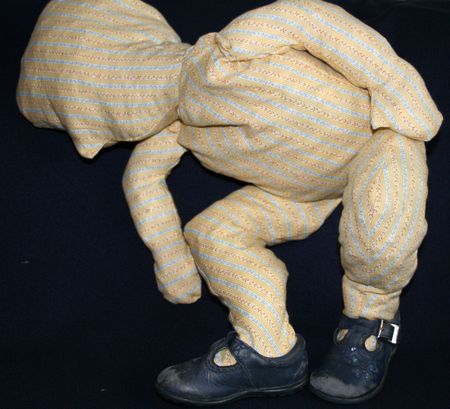
Step 4: I lightly painted it with matt black outdoor paint, leaving some of the hessian colour showing through.  This gives it a rather scarily realistic colour and markings.

If I did it again, I’d do it differently.  Attaching the legs is most problematic – I think they should have been attached to a stick-structure in the centre.  Also, the body might be stronger if it was made from chicken wire, but it would be harder to get the right shape. 

Spider

completed spider

Well, here she is!  The completed spider for my nature trail site specific sculpture project, to go with her web.  The real fun starts when I try to install them both next week.

She’s made from garden wire, sticks, hessian, garden twine and black matt outdoor paint.  If anyone is interested in how she was constructed, leave a comment below and I’ll post photos of the different stages.

‘id’

id doll 1

 Soft fabric sculpture, child’s shoes.  Stuffed with shredded documents.  Created by drawing doll-like shapes, scaled up by hand, with no measuring, plotting or checking proportion.   The result is a character with its own life, albeit not apparently a very happy one. 

id doll 2